Beads are truly unique material for creativity. From it you can make a simple bauble, and stunning interior items. And if you approach the creation of bead crafts with the soul, and even apply a little imagination, you can create an exclusive that will delight the eye and warm the soul. And you can decorate not only yourself, but also your favorite phone, keys, handbag.
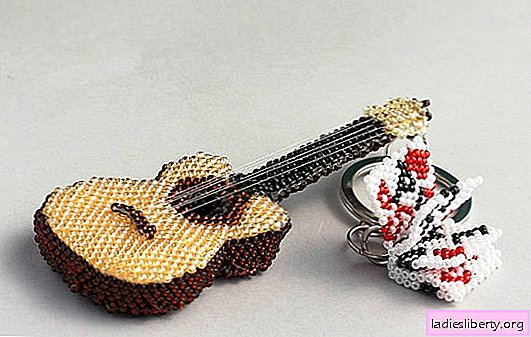
So, we will talk about trinkets. Of course, you can just buy them ... But purchased items will not be unique, no matter how much they cost. This is the secret of the popularity of handmade accessories. Do-it-yourself beaded trinkets from beads to pennies will cost, and joys will bring much more than factory stamping.

How to make a key ring "Orange Slice" from beads
The master class presented below is quite simple, and detailed descriptions and photos will help even a novice craftswoman to cope with this task. So, the first step is to prepare the material necessary for the work.

What will be required for weaving a keyring?
• Beads of dark orange, white and light orange color
• Monofilament (this is something between ordinary threads and the finest fishing line; can be bought at needlework stores)
• Bead needle (very, very thin, so that it easily slips through the eye of beads; also sold in needlework stores)
• A cotton pad or piece of cotton as a “filler” for a keyring
• Small metal ring and drawstring pendant (worth looking at hardware stores)
Now you can start creating your own keychain from beads.
The scheme of weaving the first three rows
Cut about a meter of monofilament, string six white beads on it. Pass the needle with the thread threaded into it into the first of the strung beads in the course of weaving so that a ring is obtained.
Then comes the turn of light orange beads. The second row weaves like this: string one bead, thread the needle into the second white bead in the "ring", string another orange, thread the needle into the third bead of the "ring" - and so on. This row should consist of seven beads.
In the third row there will again be white beads. They should be woven between light orange in the second row pattern.

Weaving pattern for all other rows
On the fourth row, the number of beads increases: instead of seven, there are fourteen. The weaving pattern remains the same as in the second and third rows, but the beads must be braided in two pieces at once.
In the next strip, white and orange beads alternate. They are woven again according to one principle according to this principle: oranges join with oranges, and whites, respectively, need to be woven over whites.
In the next row, the principle of weaving beads one by one is preserved. Only orange beads are used. Attach them strictly above the same color.
Then a row is woven in this way: white beads are woven over white one by one, and orange over orange pair.
The next four stripes are woven in the same way as the previous three pieces. Next, a couple of rows of white beads without increases and omissions.
After that, dark orange beads come into play. The first dark row should be weaved, making additives on every third bead, that is, according to the scheme 1 - 1 - 2. The next two stripes are made without additives. The result should be something like this.

The final row needs to be weaved from only one of the sides, before weaving, folding an orange slice in half. When the last row of gossip, you should cut the cotton pad to a size slightly smaller than the product and put it inside the wedge.

The edges of the canvas need to be sewn with a brick stitch. The final touch is to attach a loop. Her place is in that corner of the lobule where weaving ended. Important: before you fasten the loop, you should insert the prepared accessories into it, that is, the ring and ribbon, which will help to attach the key chain to the phone or purse.
That's all for the question "how to make an orange bead keychain from beads with your own hands." The product is ready, you can attach it wherever your heart desires - and enjoy a unique accessory.
Trinkets of this kind can be not only “orange”, but also slices of other fruits. To get, for example, a slice of apple or watermelon, it is enough to change the picture - the scheme remains the same.

How to make simple bead charms with your own hands
Bee
The simplest bead charms, which can be easily and quickly made with your own hands, are made by transverse or honeycomb weaving. For example, you can consider the scheme for creating a funny striped bee.
It looks like this:

You need to complete the product, moving according to the scheme from the bottom up.
There is only one bead in the initial row. It needs to be passed through a special wire (can be bought at needlework stores) and placed in the middle. After that, thread the wire again in the other direction.
Next, string another bead onto the wire so that both ends are threaded through it towards each other. All subsequent rows are strung in the same way.
From the third to the sixth row, you need to weave according to the scheme, not forgetting to monitor the ideal tension of the thread or wire so that the product does not sag and hump.
On the seventh row are bee wings. This is done as follows: eight black beads are strung on each end of the wire, and a ring is made of them (the wire is threaded into the first account).
Further weaving continues according to the pattern. Having finished the product, it is very important to securely and imperceptibly fasten the ends of the working threads or wire. And the DIY handmade bead keychain is ready!
Such schemes are uniquely simple. They are perfect for beadwork. After all, having finished the "bee", you can create many similar funny figures using similar schemes.

And let the first do-it-yourself beaded trinkets be slightly crooked, and in some places with errors - this is not too important. Because mastery in any business comes with experience. And if a novice craftswoman really wants to, unique things can be created from beads.