In order to engage in creative work with your children, you can use not only fashionable expensive designers, chic puzzles or “Build it yourself” kits, the details of which make beautiful ships, planes and carriages.
It is enough to take the simplest and most accessible material for everyone - paper, as a long-necked giraffe, a thick hippo, a bold lion “come to life” in a few minutes, and huge bouquets of chrysanthemums, roses, lilies and daisies are in paper vases.
But the most important thing is that mother does all this together with her child, which at times strengthens their already strong bond.
DIY crafts made of paper for children. Playing, learning ...
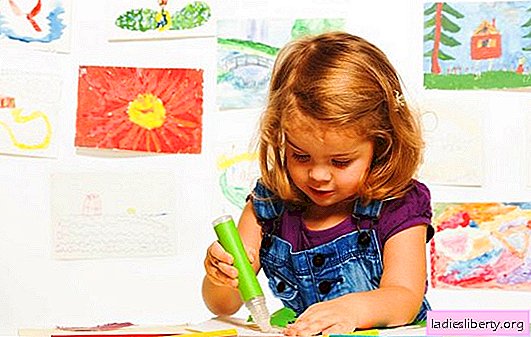
When the baby begins to tinker independently from a sheet of ordinary craft paper, he gradually learns to carefully work with scissors (under the supervision of his mother or father, of course), plus (which is of great importance for his future life) develops fine motor skills, patience and accuracy. Work with glue will also require certain skills from the peanut. Yes, it’s not always the first time everything will turn out so perfectly, neatly and beautifully, as the child and parents would like. But the main thing is to start without fear, and everything will work out.
Let's try to learn how to make interesting crafts - some will be simple, the baby will be able to cope on their own, without involving adults; others are a little more complicated, but in a team with mom, the difficulties are not terrible.
DIY crafts made of paper for children. A great gift for mom on March 8 or for a birthday is a bouquet of spring flowers.
Making it is not very difficult, the main thing is to follow the sequence of actions

1. We take a sheet of green paper (this is the basis of the bouquet), fold it in half with the white side inward, but do not outline the fold line, just hold our fingers by the edges.
2. On the bend side, it is necessary to make cuts - one from the other at a distance of about 1 cm. Until the end of the leaf, we do not cut the centimeter by 2-2.5.
3. Now this leaf should be carefully folded with a tube and straighten the cut side.
4. We take a few sheets of colored paper - red, blue, orange. Everything is optional here. This paper is our future flowers. We cut the blanks in the way that flowers appear. It will be more convenient for the baby to cut standard flowers with rounded petals. Still need to cut out the middle of the flowers. You can choose only yellow pieces of paper, or you can make the middle of multi-colored. This is also what you want. There are no rules for this, everything is at the behest of the heart.
5. Glue the middle of the flowers on the flowers themselves

6. Ready-made flowers can now be glued to green blades of grass that are already folded into a bouquet.
A beautiful flower meadow for mom is ready!
DIY crafts made of paper for children. We make autumn chrysanthemums
While working on these flowers, you can “kill two birds with one stone”: firstly, mothers create crafts for their beloved children, and secondly, kids, helping mothers, not only turn on their imagination and develop fine motor skills, but also repeat ( and who is just beginning to learn) comparisons of "big-small." So, the master class begins

1. First, prepare the petals for our flower. They can be cut in two simple ways:
- draw the borders of the petals and cut them;
- cut their paper hearts, fold them in half and cut into a fold.
The color of the petals is also selected at will - white, yellow, golden, as in the picture. The shape of the petals can be more rounded or, conversely, sharper, as in real chrysanthemums.
2. Petals we need three sizes

Quantity: two rows of eight pieces, one row - seven (the smallest petals).
3. Fold all the petals in half lengthwise.
4. Cut out a circle from paper - this will be the middle of the flower. A circle of bright orange color will look beautiful.
5. First, in a circle, glue the largest sized petals. Then, as if the top row, a little smaller.

The top layer will be of the seven smallest petals.
6. In the center of the flower you can stick several orange or white beads.
Our chrysanthemum is ready!
DIY paper crafts for kids: fluffy bunny
Even kids can make such crafts. At the age of four, many children have already learned how to cut simple shapes with paper scissors. Moms, using this little experience of their daughters and sons, can offer them to make simple paper toys.
1. To make this funny animal out of paper with your own hands, the child should be asked to cut several strips of paper of white (or gray) color that will be the same width, but one stripe is a little shorter in length (just a couple of centimeters)

2. The head of the bunny can be made from another strip of paper (shorter), which will have to be glued together with a ring.
3. Ears cut separately, the shape is arbitrary, it is better to look like an elongated petal. Stick them on top of the head separately.
4. To make paws of a bunny, it is necessary to make small cuts on both sides of the strip intended for the body.
5. We will need another piece of green paper. Just one small strip that will become a clearing for a bunny. Stick a handmade paper article on this "weed".
You can make a few more of these bunnies of different sizes to get a whole family of pussies.
DIY paper crafts for children: Santa Claus. Getting ready for the New Year
Such an article will be very useful in winter, when the whole family is waiting for the New Year holidays.
1. From a piece of pink paper (or cardboard - for strength) we cut out a circle. It will be the face of a fabulous old man.
2. Eyes, mouth and nose can be drawn with paints or felt-tip pens, or can be cut out of paper.
3. Put a red hat on Santa’s head - cut a triangle from a piece of red paper and stick it on the top of the circle, that is, the “head”. The triangle can be decorated with cotton balls: at the top of the bomb and let a little cotton on the bottom. You can smear the triangle with transparent glue and cover it with finely chopped New Year's rain. You can draw snowflakes or stick horizontal stripes or cross to cross multi-colored stripes.

4. Now the most important attribute: a beard. Despite the apparent complexity, making it very easy. Cut thin stripes of white paper and wrap each on a pencil. Quantity - as much as you see fit for the lush beard of the New Year's wizard. If it’s difficult for a baby to stick a few ribbons, you can cut off the rectangle and make cuts to the very end on one side. Then you need to wind the cut rectangle onto a pencil. Then the beard will turn curly.

You can celebrate the New Year.