A small light can always remove bad and sad thoughts from his head, and his light is so sincere: any conversation or confession by candlelight has some special aura and creates a truly unusual atmosphere.
Perhaps, just for this reason, the candle has long been considered an excellent gift, which can bring not only aesthetic pleasure, but also practical application.
How to make candles with your own hands at home: is it possible?
Naturally, such a thing as a candle can be purchased in a souvenir shop, because there you can always find many different variations of candles, but if you want to make a gift doubly pleasant, it is better to make it yourself. I would like to devote this article to the topic of how to make candles with your own hands at home.
In fact, making candles at home is not such a difficult task as it might seem initially, and if you correctly approach this issue, you will understand that in fact everything is quite simple here.
As a confirmation, we can cite the fact that people who decide to engage in the production of candles are gradually getting involved, and for them it is not just a profit, but also an interesting and fascinating activity. The more often you practice this business, the better you get finished products.
To make candles with your own hands at home does not require a lot of money, so in addition to the pleasure that you get from the manufacturing process itself, you will also manage to save a lot of money.
Making candles at home: essential materials
Before proceeding directly to the manufacture of the product itself, it is necessary to determine the necessary materials that will help our product create the necessary shape. For this, an ordinary pan is suitable, which we will need to create a water bath.
We also need some kind of container in which we will melt paraffin or wax. As a container, it is better to take some unnecessary dishes, since at the end of the process it will be extremely difficult to rid it of adhering wax.
If we take into account that the vessel is necessarily refractory, then it is hardly possible to find a better than an ordinary tin can. So, we take a tin can, bend its edge so that a small nose appears (wax will pour through it).
As for the raw materials themselves, then wax, paraffin or specialized helium can be bought in a specialized store or ordered on the Internet.
If you decide to start creating a candle for the first time, we recommend that you start with paraffin, since working with wax is much more difficult, it is less light and pliable material. You can also start with old home cinders or buy ordinary household candles.
Next, you need to take care of the material from which the wick will be made. Often, 100% cotton paper threads are used for this, since they do not have an unpleasant odor and burn much longer. Also for this purpose we recommend trying floss (threads of different colors), finding them is quite simple and they look very interesting on a candle.
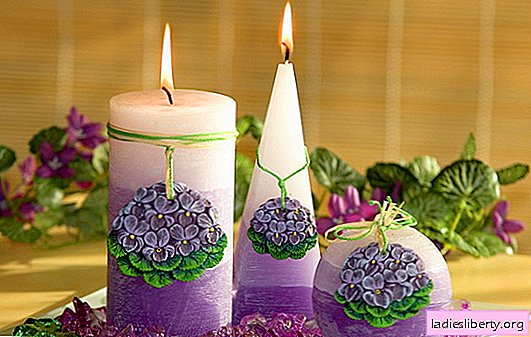
To give the candle an unusual character and color, make a decor for them and give the product a certain tone and shade. Such candles will delight you and others not only with their warmth, but also with their beauty and extraordinary appearance.
To give the product the desired color, use baby wax crayons, choose softer options, as they dissolve better and stain the molten mass more evenly. Some people use lipstick and eye shadow for this, it is also a good option if you are not sorry to sacrifice cosmetics.
There is another common option - staining with special pigments in the form of tablets. They come in a variety of colors and shades, so with their help you can make absolutely any color scheme for the product.
Before you determine how to make candles with your own hands at home, you need to decide not only on the materials, but also on their competent use. This, for example, concerns the wick, you need to learn how to twist it correctly, because it depends on how long and brightly the candle burns.
For example, if you are going to use paraffin or gel, then for these materials it is better to use thin, tightly bound threads. For wax candles, it is better to take a thickened wick, woven with a "pigtail", with not too long threads.
You also need to worry about special forms, because the main shape and appearance of the product will depend on them. It is best to use dishes that you do not really need, able to withstand elevated temperatures. For this, containers of yogurt, creams, bottles, small vials and so on are suitable.
To give the product not only an attractive appearance, but also a pleasant aromatic content, add a few drops of essential oil to the total mass, the aroma of which resembles the appearance of your candle. For example, the smell of lime or mint is perfect for the light green shade of the product, and vanilla or berry smells need warmer shades.
How to make candles with your own hands at home: technology step by step
So we come to the most important point: the process of making candles at home. For example, we will consider the option of making candles on wax.
Melting wax preparation
First, decide on the type of wax on which the candle will be prepared. Do not forget that wax can cause irritation in some people, so take this issue seriously.
The most popular today is soy wax, since it is easy to work with, it is environmentally friendly and burns more slowly than other types.
Before you begin, prepare your workplace. To do this, lay on the working surface of the newspaper, prepare cardboard and towels. You should also always keep warm soapy water near, it will come in handy in case you spill wax.
Prepare an ordinary water bath, the same as you do when cooking.
Attention! It is impossible to melt wax in direct fire. The melting process must be slow, otherwise it may burn out and evaporate.
Pour half a pan of water and put a smaller pan on top of it, it will be needed to melt the wax. Do not forget that it is almost impossible to clean the wax, so use dishes you do not need.
Put the wax on the board and cut or trim it. The smaller the pieces, the easier it will work with them.
Wax melting
Put pieces of wax or shavings in a small saucepan, and set a strong fire. When the water boils, it will begin to gradually melt the wax; do not reduce strong fire.
Use a thermometer to monitor wax temperature. For this, a confectionery thermometer, or a meat thermometer, is suitable.
Depending on the type of wax, it melts at different temperatures.
Consider the main types:
paraffin wax melts at 50-60 ° C;
bee - in the range of 62.7-79.4 ° C;
old candles - 85 ° C (before using them, do not forget to remove the old wick with forceps).
Then you need to add flavoring to the melted wax, select the flavor as you like. Flavors are sold in all craft stores. To determine the right amount of flavor, read the instructions, and then stir well.
After that, according to the instructions, you need to add the right amount of dye. Ordinary food colors in this case are not suitable, since they have a water base. It is better to opt for oily dyes or special dyes for candles. Add dyes until the mixture reaches the desired color, after which the mixture must be stirred.
Wax casting
Place the wick in the middle of the candle mold. The wick must be attached at two points outside the mold so that the fixation is in the center. For convenience, you can attach the wick on a pencil or pen, and then move it to the center. After installing the wick in the right place, fill the mold with wax. If there is a long clamp, you can use it. Clamp the wick in the very center of the mold, and it should be long enough to lean on the entire mold.
After this, pour molten wax into the prepared molds. It is necessary to pour slowly, so that the wax does not spill, while ensuring that the wick is firmly fixed in one position.
Important! If you use beeswax, do not forget that it is slightly reduced when cooling, consider this point when pouring molds.
Then let the wax cool. It is recommended to give it to cool for 20-24 hours, if possible. The longer it cools, the better the resulting material.
Each type of candle has its own cooling:
paraffin candles need to cool for 24 hours;
4-5 hours will be enough for soy;
candles on beeswax require at least 6 hours, the best solution is to leave them all night;
2-3 hours are enough for old candles.
The last steps remain - remove the product from the mold and cut the wick, leaving no more than 7 mm from the source of the candle. This length will provide your candle the desired height of the fire. If you leave the wick too long, the fire will be too large.
That's it, your homemade candle is ready, light it and enjoy!