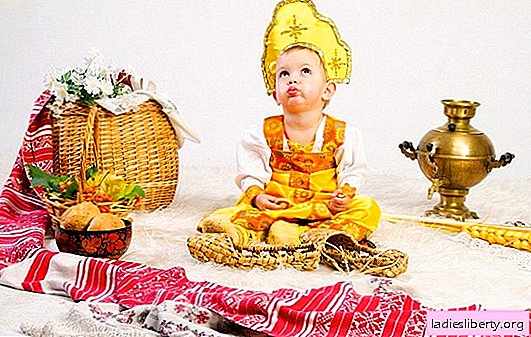
This headpiece is traditional for Russia.
Historians believe that the tradition of wearing it was brought by merchants from Byzantium. But so far this has not been proven.
In Russia, women always walked with their heads covered, and therefore there were many hats. However, only the girls who had not yet married wore exactly the kokoshnik.
After the wedding, it was impossible to wear it, since it was forbidden for married women to show hair to men other than their husband, and the design of the kokoshnik did not provide for the possibility of completely hiding hair under the fabric.
Married women began to wear this headdress already from the 1700s, when, apparently, the tradition has ceased to be so strictly observed. There were many forms of kokoshniks, but in all variations they were similar. The headpiece was always embroidered with pearls. Therefore, large and wide kokoshniks were worn only by wealthy people. The manufacture and embroidery of such an ornament required a lot of expensive pearls, which only wealthy people could afford.
In today's time there is no such problem: any craftswoman can afford a kokoshnik with her own hands of any size and with any number of jewelry. Thanks to the achievements of the modern chemical industry, artificial pearls, artificially gilded thread and a variety of sparkling rhinestones are easily accessible.

Kokoshnik manufacturing technology
The headdress when viewed from the side resembles a fan shape. Kokoshnik is made with his own hands from thick cardboard or using a metal tape. The basis for it is sewn from any fabric: velvet, paper, damask, canvas and much more. The top of the kokoshnik is a comb, the scallop is decorated with beads, beads, brocade, flowers, real river pearls, gilt threads, glass beads. Historically, gold embroidery was performed on the back side of the neck. At the back, the kokoshnik is fixed to the head with the help of ribbons sewn on both sides. Further, in different versions, there are kokoshniks who have covered their hair behind with a transparent fabric, and those who have a braided ornament on the entire frontal part of the head.
Simple technique
Sequential cardboard kokoshnik assembly instructions:
• the pattern is made. The construction will not cause difficulties even for beginners: everything is very simple and understandable, but still require a bit of artistic ability;

• a thick cardboard is taken, from which the base is cut - the frame (comb). Further, the frame is used as a pattern to make the front side and the back of the neck from the selected fabric. For those sides, satin, satin fabric or painted brocade is suitable. Allowances must be taken into account. It is enough to leave 1 - 2 cm.;
• this stage exists for that model of a kokoshnik in which patterns of fabric are outlined: stars, for example. Patterned patches are cut out. They need to be glued to doubler to give rigidity;
• to make a kokoshnik with your own hands, the finished parts of the front part and the back of the neck are sewn together. Cardboard comb while lying to the side. When sewing a sewing machine, the fabric is folded inward. The line runs 1 millimeter from the edge. Any of the lower edges is left unstitched, so that after turning the stitched part to the front side;
• the resulting part is strung on a cardboard frame. Not sewn edge is sewn. You can perform this procedure manually;
• sewn from two edges of a ribbon or elastic band, which will be tied to a knot behind the head and, in fact, hold the kokoshnik on the head;
• The last stage is decoration. Kokoshnik is decorated first around the entire outer edge. Further - towards the center. The model should not be overloaded with jewelry, as cardboard may not withstand heavy weight and tear. In addition, the comfort of wearing a headdress is taken into account: heaviness, dimensions. The frontal part can be decorated with elegant bead weaving.

Sophisticated technique
Sequential instructions for making a kokoshnik on a wire basis:
• steel wire with a diameter of more than 3 mm is prepared in advance, which can hold the mold well, pliers, thick cardboard, brocade fabric, ribbons and beads for decoration;
• then the most difficult stage begins immediately - bending the wire. In order to make a kokoshnik with your own hands, the rim must be in perfect shape;

• now cut out the "base", which will always be horizontally in a position firmly pressed to the head. Cardboard is placed on a mannequin or something similar, and the future kokoshnik is laid on it. Thus, according to the outlines of the wire, a pattern of the "base" is drawn;
• after which 2 parts of the fabric base (upper and lower) are cut in advance. Later, when the “base” is sewn to the kokoshnik, it will not work to get the exact pattern;
• a cardboard “base” is sewn to the steel rim with thick threads with a stitch frequency of 0.5 cm. With a more frequent stitch, the cardboard will not withstand the future load and will tear;
• the top of the headgear, the crest, is made in exactly the same way. Also, when applied, a cardboard pattern is cut out, and after that it is sewn to the wire. Before starting the sewing process, it is required to cut out the fabric details of the facial crest and its back (historical name);

• finishing stage. The “upper backing”, the comb and the back of the fabric are pre-cut and sewn into one piece using a sewing machine and carefully strung on top of the headgear;
• Finally, the “lower back” is sewn. A self-made kokoshnik is almost ready;
• left to sew the tape. The lower edges of the “top” are sewn along with the ribbons. The ribbon must be sewn very carefully in several lines;

• The last and final stage - decoration. Now you can safely let the fantasy go on a magical flight: rhinestones, gilt thread, sequins, pearls, pebbles and so on. Take the glue gun and go!