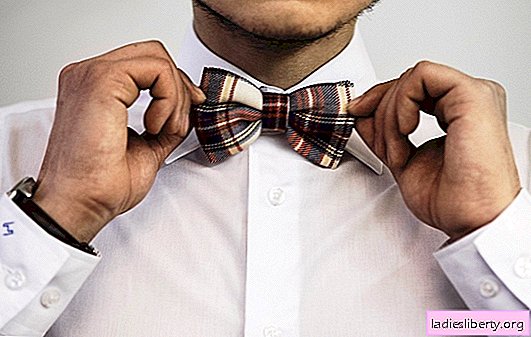
A bow tie is a recognized attribute of both women's and men's wardrobes; it is usually made of silk or cotton fabrics, wool is much less common here.
It is also interesting that there are several wearing options: in the classical one, the one who will wear this tie should independently fix it each time, tying a neat knot in the middle, when, as in a simplified tie, it is already formed in the factory, and it remains only to fasten it from the back using collar-adjustable buckles.
However, rushing to the nearest clothing store for a new thing is not necessary at all - it will be much more interesting, cheaper and even more original to try to make such a bow tie with your own hands. Start work by preparing all the necessary materials on the list. So, we need:
• Satin ribbon of the desired color - comfortable, the width recommended for sewing starts from four centimeters. Length is one meter.
• A satin ribbon is narrower, about a centimeter wide - the desired length will also be equal to a meter;
• Ordinary matches or clear nail polish will come in handy to process the “loose” edges of ribbons;
• A needle (preferably thin), scissors, as well as bobbin or silk threads in the color of the tape;
• Hooks, Velcro, buttons or any fastener convenient for you;
• Adhesive for fabric - if you do not like to sew ;.
Usually a tie of the type that we will consider in this article consists of two bows - one that is smaller in size, overlays and fastens on a large one. However, you can also make a butterfly simpler - then it will consist of only one bow, drawn by a ribbon.
A small digression: the low complexity of the craft makes it possible to do without seams, using only glue, but makeshift "seams", that is, gluing places in this case, it is recommended to iron with iron at temperatures acceptable for a particular fabric. However, it must be borne in mind that some types of glue may not be suitable for heat treatment.
For a tie of two bows, prepare two pieces of tape - one shorter (twenty-twenty-five centimeters), the other more genuine, thirty-forty centimeters long.

If there are no satin ribbons, the butterfly can also be made of kapron, but note that then all the seams will have to be carefully hidden, because they can be visible through the fabric. If you decide to make a tie from a cotton ribbon or a woolen cut of fabric, then be prepared for the fact that such a material can turn out to be rather rough in structure - which means that there are likely to be some difficulties with drapery.
After pretreating the edges with clear varnish or flame, take a piece of tape twenty centimeters and fold it in half, combining the ends of the fabric. The resulting joint should be at the back, so if you see it in front of you, turn the butterfly face up to you. With a seam “forward needle” we carry out the assembly exactly in the middle of the workpiece; at the same time, try to overwhelm and flash the ends located at the back. Ultimately, the thread will need to be tightened and fastened; for strength, you can even wrap the assembly site with thread and glue it. Make sure that the glue is as transparent as possible and does not leave ugly yellow spots on the fabric. If there is no suitable glue in the arsenal, the assembly site can also be smeared with transparent nail polish. A large bow is done in the same way, then the bows are joined by overlaying a small bow on a large one. The connection can be either flashed or glued.
Tip: if you decide to make a simple bow tie from ribbons with your own hands, then perhaps you need a tape a little wider, say, five to six centimeters wide. It is recommended to make the assembly more magnificent: for this, after making one seam “forward needle”, you need to make two arcuate seams on each side, as shown in the picture:

Prepare a narrow tape a centimeter wide - it will serve as the base that holds the bow tie and fits under the shirt collar. The length here is selected based on their own dimensions, plus a few centimeters in case you plan to attach adjustable fasteners.
Edges to which convenient fasteners will be sewn need not only to burn or varnish, but also to strengthen. You can do this in several ways: the tape bends a little and is sewn close to the edge; It can be felt, drape or even a leather substitute.

Cut about three to four centimeters from a wide tape. We will need this piece in order to close the assembly place on a small bow; the necessary length should be selected not end-to-end, but taking into account the fact that the butterfly will move along the tape if necessary. However, if you want to leave the tie static, you can just sew it to the ribbon, but in this case you will have to very accurately calculate its position on the neck.
The ends of a piece of tape are sewn into the ring at the back, and thus the tie can move freely around the tape.

Do-it-yourself bow tie for ... pets. Fashion cat!
If your pets wear a collar, then a butterfly can be made for them - then a thin base tape is not needed. Bows are collected in the manner described above, and the finished butterfly is attached with a thread or glue to the collar. If the animal shakes off the product or feels uncomfortable, it is better to refuse such an idea.
Do-it-yourself ribbon decor
There are a great many options for decorating a bow tie. You can use both artificial or natural, precious or semi-precious stones, and ordinary applications (for example, if the butterfly is designed for a child). Small sparkles are also suitable, which need to be “planted” on a special glue, for example, like this, you can decorate a homemade tie by applying powdery sparkles along the lines marked with a blue dotted line in the picture:

A self-made bow tie can be either an original gift or a luxurious, exclusive element of a personal wardrobe that you will never find on anyone else.
Wear it with pleasure!